AR Throwing (AR Foundation: ARKit, ARCore) — Unity Asset
AR Throwing — Unity Asset which combines Augmented Reality and Throw Mechanics for Mobile Platforms. AR Safety First.
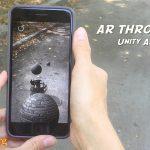
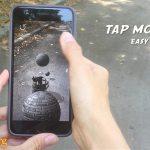
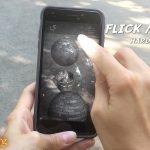
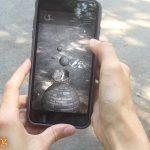
During an encounter with a target, a player may throw a ball (or any object you want) by tapping any point on the screen (easy mode) or by flicking (swiping) the ball from the bottom of the screen up toward the target (hard mode). Both modes form different speed and throw direction based on the last tap point, what makes the game even more interesting.
Toss Diligently & Hit the Targets!

Contents
AR Engine
The game uses 2 AR Engines with auto selection:
- AR Foundation (ARCore, ARKit) with the next features:
- Real Plane Detection (includes tutorial, visual plane confirmation/resetting, placing the game around the player).
- AR Safe Zone. The player needs to stay in the Safe Zone to avoid accidents during the game and continue the game itself! The player will be notified when leaving the Safe Zone. Learn More on the page of AR Shadow.
- AR Onboarding UX with Transparent Video Manuals & AR States.
- AR Light Estimation: estimates light data in physical space and applies it to game space.
Learn More on the page of AR Shadow.
- AR Camera Lite will be used when AR Foundation is not supported by the mobile device. It’s also used when Testing in Unity Editor: the game in Editor is always run with this Engine.
Features of AR Throwing
Bring the enchanting Power of Augmented Reality into your amazing AR Throwing Game or App:
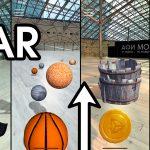
- 3 unique containers: Barrel, Bucket & Bucket Group.
- 2 Throwing Modes with Throw Object 3D (docs): “Click” (Easy) & “Flick/Swipe” (Hard).
- 10 different items to toss: balls, weapons, etc. Easy implementation of your own Throwing Objects.
- Dynamic Sound System: play Throwing Sounds based on speed, pitch and volume factors of Throwing Objects.
- Tons of Customizable Parameters for Throwing (Force, Torque, Delays, Rotation, Position, etc.).
- Custom Meshes of Containers created with Technie Collider Creator (it’s not needed to run the project). They allow computing collisions more accurately.
- Real-Time AR Shadows (docs).
- Mobile Optimizations:
- Object Pool for Throwing Objects to manage the memory,
- TextMesh PRO for Texts to update them when really needed.
Package Contains
- Unified Demo Scene for both AR Engines with Tutorial and 3 Different Containers.
- Throw Object 3D (docs).
- AR Camera Lite (docs).
- AR Shadows (docs).
- Menu Scene with AR Safety Tutorial.
- Permission Scene with Camera Permission Request using free Native Camera.
- Loading Screen to switch scenes seamlessly.
Check the Map of Unity Assets to choose the product that best suits your needs.
Use Cases of AR Throwing
Popular Mobile Games:
- Paper Toss Boss;
- Paper Toss (iOS, Android);
- Paper Bin AR.
Unity Assets:
1. AR Basketball (docs).
2. AR Throw & Score (docs).
Limitations
Learn Limitations separately for Each Asset included in the package.
Tutorial
This tutorial is relevant for AR Throwing 3.2+.
Tutorial for the previous version can be found only in the asset folder.
Getting Started with AR Throwing
Folders & Files in the package by default:
- Makaka Games;
- XR.
Steps
If you have any issues with the first launch then just Reach Support with Invoice Number and Get Help.
If you read this tutorial from PDF, first check the latest docs online to get actual information.
- Create New Unity Project with Unity 2021.3.4 & “3D” Template.
- File > Build Settings > iOS or Android > Switch Platform.
- Next Packages must be manually installed with Git & Unity Package Manager:
- Download and import AR Throwing into Unity.
- Warning Windows:
- Click “Import” to overwrite the Project Settings with predefined ones.
- Click “Install/Upgrade” for Package Manager Dependencies.
- Click “No” when enabling the backends for the new input system.
- Warning Windows:
- Next Packages are provided with Unity Package Manager, and they are already installed for this Asset by default. If packages are missing (Warning Window did not appear) then install them again with Unity Package Manager (with advanced settings enabled: “Pre-release Packages” & “Show Dependencies”):
- TextMesh Pro 3.0.6:
- Always Required: Window > TextMeshPro > Import TMP Essential Resources.
- AR Foundation 4.2.3;
- AR Subsystems 4.2.3;
- ARCore XR Plugin 4.2.3;
- ARKit XR Plugin 4.2.3;
- Editor Coroutines 1.0.0;
- Input System 1.3.0;
- Subsystem Registration 1.1.1;
- XR Legacy Input Helpers 2.1.9;
- XR Plugin Management 4.2.1.
- TextMesh Pro 3.0.6:
- Reopen Unity Project.
- Open Scene: Makaka Games > AR > AR Throwing > Scenes > Demo.
- Test in the Unity Editor or Build for Mobile.
Each Unity Asset included in AR Throwing has its own documentation in the target folder or on the website (the latest docs).
Testing
Basic Editor Testing (without smartphone & plane detection) is provided by AR Camera Lite (docs) to imitate smartphone motion:
- translational: WASDQE keys — such way you can test AR Safe Zone.
- rotational: Right Mouse Button.
Use Left Mouse Button to Throw.
Use Fullscreen of Game View in Unity Editor while testing to get a seamless experience.
Auto Selection of AR Engine goes next way:
- The game starts with AR Camera Lite and checks the support of the gyroscope. If gyro is not supported then the game will be run with an accelerometer, otherwise, step 2 will be run.
- AR Foundation support is checked by the AR Foundation Support Checker. If it’s not supported then the game will be run with gyro using AR Camera Lite, otherwise, the game will be run with AR Foundation.
On the Mobile Device, you can forcibly test Game Version with AR Camera Lite and:
- gyroscope on AR Foundation supported devices: Hierarchy View > AR Foundation Support Checker > Is AR Unsupported Not In Editor Test > Check, then Build And Run.
- accelerometer. Check Docs of AR Camera Lite.
Tested with Mobile Devices
- iOS on iPhone XS Max.
- Android on Samsung Galaxy A71.
Support
First, read the latest docs online.
If it didn’t help, get the support.
Changelog
Check the current version of AR Throwing on Asset Store.
The latest versions will be added as soon as possible.
3.3:
Improvements:
3.2:
Improvements:
3.1:
Features:
- AR Onboarding UX with Transparent Video Manuals & AR States;
- AR Light Estimation: estimates light data in physical space and applies it to game space.
Improvements:
- Plane Detection Tutorial: Loading Animation, Clearer Guidance;
- Modern Standards of Project Settings (based on New Unity Project);
- AR Shadow 3.0 (docs);
- Native Camera 1.3.0.
Fixes:
- Centers of Mass for Sword and Broken Sword to provide natural rotation when Throwing.
- iOS: “Error Domain=com.apple.arkit.error Code=102 “Required sensor failed.”
3.0:
- Unity 2021.1.20;
- Game Version with AR Foundation (ARCore, ARKit) & Plane Detection. It will run by default if the device supports it, otherwise, the Game Version with AR Camera Lite will be run.
- AR Safe Zone for Game Version with AR Foundation. The player needs to stay in the Safe Zone to avoid accidents during the game and continue the game itself! The player will be notified when leaving the Safe Zone.
- Using of Native Camera to check Camera Permission before the Demo Scene.
- Throw Object 3D 4.4 (docs).
- AR Camera Lite 4.2 (docs).
- AR Shadow 2.2 (docs).
2.0:


